





The water damage restoration process begins by stopping the water source and inspecting the property for visible and hidden moisture. Restoration professionals then extract standing water, remove unsalvageable materials, dry and dehumidify the structure, clean affected areas, monitor moisture levels, and complete repairs. When insurance coverage applies, the restoration company may also document the loss and coordinate the approved scope of work with the insurance adjuster. Water damage can develop after a burst pipe, leaking appliance, overflowing toilet, defective boiler, roof leak, coastal flooding, or wind-driven rain. No matter how the water enters, the first few hours matter. Moisture can move through drywall, flooring, insulation, cabinets, ceilings, and structural materials. Therefore, fast mitigation may reduce secondary damage and make more items easier to save.
Long Island homeowners also face local risks that can complicate water emergencies. Older plumbing systems may fail without warning. Heavy rain can enter through roofs, foundations, windows, or exterior walls. In addition, coastal storms can expose homes in Nassau and Suffolk counties to wind-driven rain and flooding. A professional response helps determine where the water traveled and whether moisture remains hidden behind finished surfaces.
True Restorations provides full-service water damage cleanup and repair throughout Long Island. Our team manages the emergency assessment, water extraction, structural drying, moisture monitoring, insurance coordination, contents protection, and final restoration. Rather than stopping after mitigation, we can complete the repairs needed to bring the property back to its pre-loss condition.
1. Why Immediate Water Damage Mitigation Matters
Water rarely remains in one visible area. It follows gravity, moves through porous materials, and spreads along seams, framing, and floor systems. A puddle in one room may affect the wall cavity, flooring, subfloor, or ceiling below. As a result, the visible damage may represent only part of the affected area. Fast mitigation helps reduce this spread. It also gives technicians a better chance to dry materials before they lose strength or develop permanent damage. Drywall may become soft. Wood flooring may cup or buckle. Cabinets may swell. Carpet padding may trap moisture beneath the surface.
Delays may also create conditions that support mold growth. Mold can develop when porous materials remain damp for too long. Therefore, professional drying should begin as soon as the water source is controlled.
Common causes of residential water damage include:
- Burst or leaking water pipes
- Overflowing toilets, sinks, tubs, and showers
- Washing machine or dishwasher supply-line failures
- Defective boilers and hot water heaters
- Roof leaks and wind-driven rain
- Basement seepage and groundwater intrusion
- Coastal flooding and storm-related water entry
- Drain backups and plumbing blockages
Each source requires a different response. Clean water from a supply pipe may allow more materials to remain in place. However, water from a drain backup, toilet overflow, or flood may require additional removal, cleaning, and safety controls.
2. Step-by-Step: How the Water Damage Restoration Process Works
The restoration team follows a planned sequence to control the emergency, determine the damage, and dry the property safely. Although each loss is different, most projects include emergency response, inspection, extraction, drying, cleaning, monitoring, and repairs.
The exact scope depends on the type of water, the amount of water, the materials involved, and how long the area remained wet. A small appliance leak may require limited drying. In contrast, a flooded basement or burst pipe may affect several rooms and multiple building materials.
Step 1: Emergency Response and Water Source Control
The first step involves stopping, slowing, or neutralizing the source of the water. Restoration cannot succeed while water continues entering the property. Therefore, the team first determines whether the problem comes from plumbing, roofing, an appliance, groundwater, or another source. A homeowner may be able to close a fixture valve or turn off the main water supply. However, not every source is safe or easy to reach. Water near outlets, electrical panels, appliances, or exposed wiring may create serious risks. In those situations, homeowners should stay away from the area and wait for trained professionals.
The restoration team may coordinate with a plumber, roofer, electrician, or other specialist when the source requires a separate repair. For example, a burst pipe must be repaired before structural drying can proceed effectively. Likewise, a leaking roof may require temporary protection to prevent additional rain from entering.
Before help arrives, homeowners can take a few safe actions:
- Shut off the water: Close the appropriate valve when it is safe and accessible.
- Avoid electrical hazards: Do not enter standing water near outlets, appliances, or wiring.
- Protect occupants: Keep children and pets away from the affected area.
- Move dry belongings: Relocate unaffected items when doing so does not create a safety risk.
- Document the condition: Take photos and videos before moving or discarding damaged materials.
True Restorations offers 24/7 emergency response for water-related property damage in Nassau and Suffolk counties. Our team can arrive quickly, evaluate the source, and begin mitigation before moisture spreads farther through the home.
Step 2: Property Inspection and Moisture Mapping
Once the source is under control, technicians inspect the affected areas. They look for visible damage and use specialized equipment to detect moisture that cannot be seen from the surface. This stage is essential because water can travel behind drywall, beneath flooring, inside cabinets, and through insulation. A wall may look dry while moisture remains inside the cavity. Similarly, carpet may feel only slightly damp even though the padding and subfloor hold a much larger amount of water.
Technicians may use moisture meters to compare affected materials with dry areas of the property. These readings help define the boundaries of the loss. They also establish a dry standard that the team can use during monitoring.
The inspection may cover:
- Walls, ceilings, floors, and baseboards
- Carpet, padding, hardwood, laminate, and tile
- Cabinets, vanities, and built-in features
- Insulation and accessible framing
- Rooms beside or below the original water source
- Personal belongings and furniture
- Areas with stains, odors, swelling, or softness
The team also evaluates the type of water involved. Water from a clean supply line presents different conditions than water from a toilet overflow, drain backup, or coastal flood. This classification helps determine what can be cleaned, what can be dried, and what must be removed.
A detailed inspection supports the entire water damage restoration process. It gives homeowners, technicians, and insurance adjusters a clearer picture of the damage before work begins.
Step 3: Water Extraction and Removal
After the inspection, technicians remove standing water from the property. This step may involve portable extractors, pumps, wet vacuums, or truck-mounted equipment. The tools depend on the depth of the water, the size of the affected area, and the materials involved. Fast extraction reduces the amount of water that building materials must release during drying. It also helps lower indoor humidity and limits the movement of water into adjacent rooms.
Technicians may extract water from carpet, hard flooring, basements, crawl spaces, and other accessible areas. They may need to lift carpet, remove saturated padding, detach baseboards, or create access points so trapped water can escape. Not every wet material requires removal. Some surfaces may dry successfully in place when the water is clean and the material remains structurally sound. However, heavily saturated, contaminated, swollen, or damaged materials may need to be removed.
Common materials considered during extraction include:
- Carpet and carpet padding
- Drywall and insulation
- Hardwood or laminate flooring
- Baseboards and trim
- Cabinets and vanities
- Ceiling materials
- Upholstered furniture
- Stored boxes and personal belongings
The goal is not simply to make the floor look dry. The team must remove enough water to create effective conditions for structural drying.
Step 4: Protecting Furniture and Salvageable Contents
Water damage may affect more than the building. Furniture, electronics, documents, clothing, photographs, artwork, and household belongings may also require attention. Technicians first separate wet items from dry items. They may move furniture away from damp walls or place protective barriers beneath furniture legs. Some belongings can remain onsite during drying. Others may need cleaning, packing, or temporary storage.
When a room contains many affected items, the restoration company may perform a contents pack-out. This process involves documenting, organizing, and moving salvageable belongings to a safe location. The additional space also helps technicians access wet floors, walls, and cabinets.
True Restorations can safeguard salvageable contents during cleanup and rebuilding. When necessary, we can store those items offsite in a climate-controlled warehouse and coordinate the work with the insurance carrier.
Contents handling may include:
- Photographing and documenting affected belongings
- Separating salvageable items from unsalvageable items
- Moving dry contents out of the affected zone
- Packing and labeling items for temporary storage
- Cleaning items when restoration is possible
- Returning stored belongings after repairs are complete
Homeowners should avoid discarding expensive or important items before documenting them. When an insurance claim applies, photos and written records may help support the evaluation of the loss.
Step 5: Removal of Unsalvageable Materials
Some building materials cannot remain in place after severe saturation or contamination. Technicians may remove these materials to expose hidden moisture and allow the structure to dry correctly. For example, wet insulation may hold water inside a wall cavity. Saturated carpet padding may prevent the subfloor from drying. Swollen drywall may lose its strength. Laminate flooring may separate or buckle after water reaches the core.
Removal decisions should rely on the type of water, the length of exposure, the material condition, and industry guidelines. Restoration professionals try to save materials when practical. However, leaving damaged or contaminated products in place can interfere with drying and create future problems.
Selective demolition may involve:
- Cutting damaged drywall above the wet line
- Removing wet insulation
- Detaching baseboards and trim
- Lifting damaged flooring
- Removing saturated carpet padding
- Opening cabinet toe kicks
- Disposing of materials that cannot be cleaned safely
The crew should document removed materials before disposal. This record may support the insurance estimate and explain why each item required replacement.
Step 6: Structural Drying and Dehumidification
After extraction and necessary removal, technicians begin structural drying. This stage targets moisture that remains inside porous materials and indoor air. Air movers increase airflow across wet surfaces. This movement encourages moisture to leave the material and enter the air. Dehumidifiers then remove that moisture from the air and collect it as water. Together, these machines create controlled drying conditions.
Technicians place equipment according to the size, layout, and moisture level of the affected area. They may also use containment barriers to separate the drying zone from the rest of the home. Simply placing equipment is not enough. The team must measure and adjust the setup throughout the project. Airflow may need redirection. Dehumidifiers may require repositioning. Equipment may need removal as certain materials reach the target moisture level.
The drying setup may include:
- Commercial air movers
- Low-grain refrigerant dehumidifiers
- Containment barriers
- Floor drying systems
- Cabinet or wall cavity drying equipment
- Air filtration devices when conditions require them
- Moisture meters and environmental monitoring tools
True Restorations follows IICRC guidelines when setting up, monitoring, and adjusting drying equipment. Our technicians take daily readings to confirm that materials are progressing toward the established dry standard.
Step 7: Daily Moisture Monitoring
Drying time varies from one property to another. Therefore, technicians return to measure moisture and environmental conditions during the dry-down period. They compare current readings with the initial inspection results and the dry standard. This comparison shows whether drywall, wood, flooring, framing, and other materials are releasing moisture at the expected rate.
Monitoring also helps the team identify areas that need additional attention. A wall cavity may remain wet after nearby surfaces have dried. A cabinet base may require targeted airflow. A floor system may need a specialized drying method.
Daily monitoring may include:
- Recording moisture levels in affected materials
- Checking indoor temperature and relative humidity
- Measuring the performance of dehumidifiers
- Repositioning air movers
- Removing equipment from completed areas
- Expanding drying efforts when hidden moisture appears
- Updating the homeowner and insurance adjuster
Equipment should remain in place until readings confirm that the affected materials have reached acceptable limits. Removing machines too early may leave moisture behind and increase the risk of odors, material failure, or mold growth.
Step 8: Cleaning, Sanitizing, and Mold Prevention
Once extraction and drying are underway, the team cleans affected surfaces. The required methods depend on the source of the water and the materials involved. Clean-water losses may need surface cleaning and deodorization. However, water from drains, toilets, or flooding may require more extensive sanitation. Porous materials exposed to contaminated water may need removal rather than cleaning.
Technicians may apply appropriate cleaning solutions to exposed surfaces. They may also use a biocide or mold-inhibiting treatment when the conditions and approved scope call for it. According to the available service process, True Restorations applies a mold inhibitor to exposed surfaces after the dry-down reaches the required limits. Cleaning helps address dirt, residue, odors, and microorganisms that water may leave behind. However, treatment does not replace drying. Moisture control remains the most important step for preventing ongoing problems.
Step 9: Insurance Documentation and Claim Coordination
Water damage creates stress for homeowners, especially when an insurance claim is involved. The carrier may request photographs, moisture readings, equipment records, estimates, invoices, and explanations of damaged materials. A restoration company can help organize this information. Technicians document the source, affected rooms, moisture boundaries, extraction work, removed materials, drying progress, and repairs. They can then share the approved estimate and supporting records with the insurance adjuster. Homeowners should contact their insurance carrier promptly and ask about claim requirements. Coverage varies by policy and by the cause of the water. For example, sudden water discharge may receive different treatment than long-term leakage, groundwater, or coastal flooding.
Useful insurance documentation may include:
- Photos and videos of the initial damage
- The date and time the loss was discovered
- Notes about the suspected source
- Moisture maps and drying records
- Lists of damaged building materials
- Inventories of affected belongings
- Emergency service invoices
- Repair estimates and completion records
True Restorations can assist with filing the claim, communicate with the insurance adjuster, provide a detailed estimate, and bill the insurance company directly for approved services. This support can help homeowners focus on their families and property while the claim moves forward.
Step 10: Repairs and Reconstruction
Mitigation stops the damage and dries the structure. Restoration repairs the materials that the crew removed or that water damaged beyond repair. Some companies perform only extraction and drying. Homeowners must then find a separate contractor to replace drywall, paint walls, install flooring, repair cabinets, or complete other finishing work. This handoff may create delays and communication problems.
True Restorations provides full-service restoration. After the affected areas reach the proper moisture levels, our team can repair the property and return it to its pre-loss condition. Reconstruction may include drywall replacement, insulation installation, painting, trim work, flooring, cabinetry, and other necessary finishes. The exact work depends on the approved scope and the amount of damage.
Repairs should not begin before drying is complete. Installing new materials over damp framing or subflooring may trap moisture and cause future damage. Therefore, verified drying protects both the home and the new construction.
3. How Long Does Water Damage Restoration Take?
The time needed for water damage restoration depends on the size of the affected area, the source of the water, the materials involved, and how quickly cleanup begins. In many cases, water extraction and structural drying take several days. However, larger losses may require more time, especially when water has entered drywall, insulation, flooring, cabinets, or hidden wall cavities. Contaminated water, severe flooding, and delayed response can also extend the timeline because more materials may need removal, cleaning, and replacement.
Repairs may begin only after moisture readings confirm that the affected materials have reached an acceptable dry standard. As a result, the full restoration timeline may range from a few days for minor damage to several weeks for extensive losses involving reconstruction, contents storage, or insurance approval. True Restorations monitors drying progress, adjusts equipment as needed, coordinates with insurance providers, and completes necessary repairs so Long Island homeowners receive a thorough restoration rather than a rushed surface-level fix.
4. When Should Long Island Homeowners Call a Restoration Company?
Long Island homeowners should contact a restoration company as soon as water reaches drywall, flooring, insulation, ceilings, cabinets, or other porous materials. Professional help is also important when standing water covers a large area, the source remains active, or moisture may be hidden behind walls or beneath floors. Warning signs such as sagging ceilings, buckled flooring, musty odors, recurring mold, or spreading stains often indicate that the damage extends beyond the visible surface. Immediate assistance is especially necessary when the water comes from a toilet overflow, drain backup, coastal flooding, or storm-related intrusion because contaminated water may require specialized cleaning and material removal.
Homeowners should not wait for wet areas to dry naturally when several rooms are affected or when electrical systems, structural materials, and valuable belongings are at risk. Household fans may dry the surface while leaving moisture trapped inside building materials, which can lead to odors, mold growth, and further deterioration. True Restorations provides prompt water extraction, moisture detection, structural drying, sanitation, insurance coordination, and repairs throughout Nassau and Suffolk counties. Calling our team early can help limit the damage, protect salvageable materials, and make the recovery process more manageable.
5. How to Reduce Future Water Damage Risks
Preventing water damage starts with regular inspections, timely maintenance, and quick attention to small leaks. Long Island homes face risks from aging plumbing, heavy rain, coastal storms, appliance failures, and basement moisture. A few simple precautions can reduce emergencies, protect valuable materials, and lower the chance of costly restoration work.
- Inspect Plumbing Regularly: Check visible pipes, supply lines, shutoff valves, faucets, and connections beneath sinks for corrosion, moisture, or slow drips. Pay close attention to older plumbing and areas near bathrooms, kitchens, and laundry rooms. Repair small leaks promptly before they spread into walls, cabinets, or flooring.
- Maintain Appliances: Washing machines, dishwashers, boilers, refrigerators, and water heaters can cause extensive damage when hoses or connections fail. Inspect supply lines for cracks, swelling, rust, or loose fittings, and replace worn parts as recommended. Schedule routine appliance maintenance to reduce the risk of sudden leaks.
- Control Exterior Drainage: Clean gutters and downspouts so rainwater can move safely away from the roof and foundation. Check grading around the property and repair damaged seals near windows, doors, and exterior walls. Improve drainage before heavy Long Island storms expose weaknesses and allow water to enter.
- Install Water Sensors: Place leak detectors near boilers, water heaters, washing machines, sump pumps, toilets, and basement plumbing. Smart sensors can send alerts when moisture appears, while automatic shutoff systems may stop the water supply. Install monitoring devices in high-risk areas for faster warning and response.
- Check After Severe Weather: Inspect the attic, basement, ceilings, windows, and exterior walls after heavy rain, coastal storms, or strong winds. Look for stains, damp materials, musty odors, and loose roofing components. Contact a professional quickly when storm-related moisture appears or continues spreading.
Contact True Restorations for professional water damage prevention guidance, inspections, and restoration services across Long Island. Our team helps homeowners identify risks early and protect their properties before emergencies happen.
6. Restore Your Long Island Property With a Complete Plan
Recovering from water damage requires more than removing visible water. A complete restoration plan must address the source, hidden moisture, damaged materials, indoor drying conditions, sanitation, and final repairs. Without a structured process, moisture may remain behind walls, beneath flooring, or inside insulation, increasing the risk of odors, mold growth, and repeated damage. Long Island homeowners benefit from working with a restoration company that manages every stage carefully and confirms that the property is dry before rebuilding begins.
True Restorations provides full-service water damage restoration throughout Nassau and Suffolk counties. Our IICRC-certified professionals inspect affected areas, identify hidden moisture with specialized meters, extract standing water, and set up commercial air movers and dehumidifiers. We monitor drying progress with daily readings and adjust equipment as needed to meet established drying standards. When belongings require protection during cleanup or reconstruction, we can also arrange climate-controlled offsite storage for salvageable contents.
Our work does not end after mitigation. True Restorations can assist with insurance documentation, communicate with the adjuster, provide detailed estimates, and complete the repairs needed to return your home or business to its pre-loss condition. This full-service approach gives Long Island property owners one dependable team from the initial emergency response through the final restoration. Contact True Restorations today for professional water extraction, drying, insurance coordination, and complete property restoration.
Conclusion
Understanding the water damage restoration process helps Long Island homeowners know what to expect after flooding, a burst pipe, storm damage, or an appliance failure. A complete response includes stopping the source, removing standing water, detecting hidden moisture, drying affected materials, cleaning the property, documenting the loss, and completing repairs. Acting quickly can limit further damage, protect salvageable belongings, and reduce the risk of mold, odors, and structural problems.
True Restorations provides full-service water damage restoration throughout Nassau and Suffolk counties. Our IICRC-certified team manages every stage, from emergency water extraction and moisture monitoring to insurance coordination and final reconstruction. Contact True Restorations today for reliable water damage cleanup and complete property restoration across Long Island, NY.
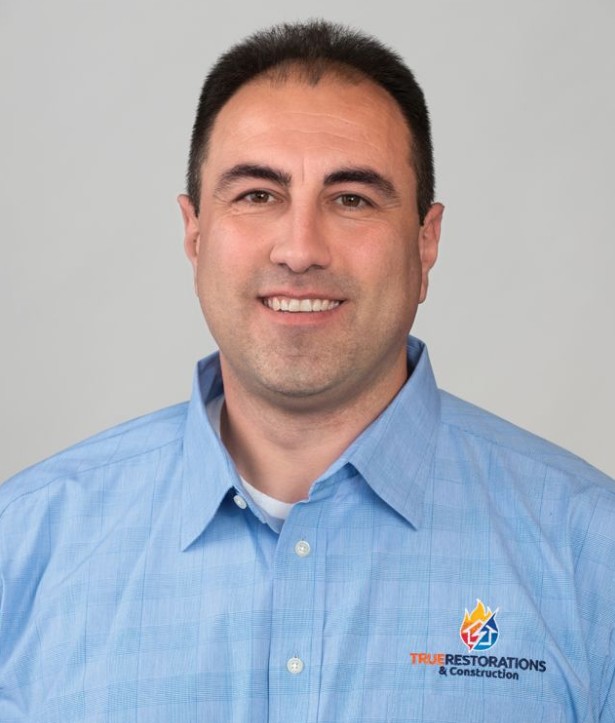
Frank Ranieri is the Co-Founder and CEO of True Restorations Inc., serving Long Island homeowners and businesses with nearly 11 years of restoration industry experience. Certified in water restoration, trauma cleanup, and health and safety, Frank specializes in helping property owners recover from water, fire, mold, and storm damage through expert guidance and quality restoration services.